Monday, August 29, 2011

Salmon Tartare


I was a little bit surprised when looking over my salmon recipes (17 posts!) that I didn’t publish recipe for Salmon Tartare, one of the simplest and fastest way so serve a salmon. There are as many versions of Salmon Tartare as there are cooks. It is pretty much almost-anything-goes with one important exception: just like anything Tartare (basically raw protein) it has to be absolutely fresh. To be on a safe side and also to make it easier to chop I freeze my overnight and then let it partially de-freeze in refrigerator till I can chop it with my cleaver.


Ingredients
Salmon fillet, skinless and boneless, about 6 oz.
1 Tbs. capers, chopped
Lemon zest from 1 lemon
Lemon juice from 1/2 lemon
1/2 Avocado, chopped
1/4 tsp. coarse sea salt or to taste
Furikake for garnish, optional
Cucumber slices for serving

Slice the fillet into 1/4” slices, place in sandwich bag and freeze overnight. 1 hour before preparing the Tartare, remove salmon from freezer and place in warmest part of refrigerator. Cut the fillet slices into 1/4” julienne and then into 1/4” cubes. Place chopped salmon into mixing bowl.
Add chopped capers, lemon zest, lemon juice, chopped avocado and sea salt.
Mix with fork till well combined.
Serve on slices of cucumber and garnish with Furikake (optional).
This is very quick and healthy snack.

Friday, August 26, 2011

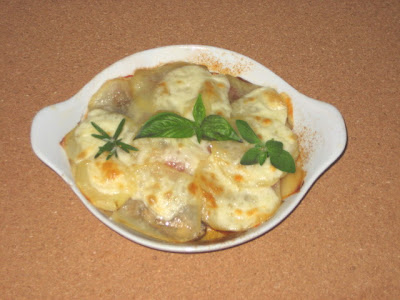
Ratatouille and Pork Sausage.


I had some homemade pork sausage on hand but not enough for meal for 2. I could have used it in a pasta sauce but since I have so many Oriental eggplants I had to incorporate them somehow. Since it is one of ingredients in French Ratatouille I had decided to improvise something new (I have never seen a recipe similar to what I came up with).
Again, there is not much of a detailed recipe.

Preheat oven to 350 °F.

Butter ovenproof dish and spread raw pork sausage, store bought is fine, into 1/2” layer.

Next, lay down row of eggplant, than tomatoes, zucchini, followed by white onions, more tomatoes and more eggplant, all sliced. This is basically layer of Ratatouille. The veggies were seasoned with sea salt and about 2 tsp. of “Herbes de Provence”. (To mix your own “Herbes de Provence” I have included recipe at the end of this post.)


Since it didn’t look like there is enough substance I peeled and sliced Yukon potato and covered vegetables with overlapping potato slices. I lightly salted potatoes and sprinkled olive oil on top. In order for vegetables and meat to heat evenly I covered the top with parchment paper and then aluminum foil. (The paper prevents salt from interacting with aluminum and burn holes in the foil.) Place the dish on baking sheet and bake on middle oven rack for 45 minutes

Right from beginning I was going to top the veggies with slices of Provolone cheese so after 45 minutes raise the temperature to 450 °F, remove dish from oven, remove the foil and paper and cover potato slices with layer of cheese. Put back in oven and bake another 15 minutes or till cheese starts to bubble.


To serve, remove from oven and let sit for 5 minutes. Cut across the rows of vegetables with sharp knife into 2 portions and serve on preheated plates with slices of crusty French baguette.
This is a definite “will-make-again” meal.
Herbes de Provence
Ingredients
2 tablespoons dried savory
2 tablespoons dried rosemary
2 tablespoons dried thyme
2 tablespoons dried oregano
2 tablespoons dried basil
2 tablespoons dried marjoram
2 tablespoons dried fennel seed
Directions
In a small mixing bowl, combine all the ingredients together. Store in an air-tight container.

Thursday, August 25, 2011

Pork Tenderloin Shish-Kebab


In my kitchen one of the best uses for pork tenderloin is kebab with lots of vegetables and grilled on medium hot BBQ. In this version I used flat bamboo skewers (only kind I use lately). As you can see in picture bellow the order of ingredients was pork, smoked bacon, Cremini mushroom, white onion, red pepper and zucchini. This I repeated 3 times, finishing with pork so that veggies will not fall off while turning on the grill.

I grilled them for 3 – 4 minutes on each side for a total of about 15 minutes. Tenderloin becomes very dry if overcooked. During turning is where the flat skewers come so handy. All sides were basted with hickory BBQ sauce and kebab was served with steamed rice, as usual. Also, as I always do when using bamboo skewers, I laid piece of aluminum foil under the exposed ends of skewers to prevent them from burning.
I used only half of pork tenderloin and it was enough for 2 people.

Wednesday, August 24, 2011

Hummingbirds, Part 2

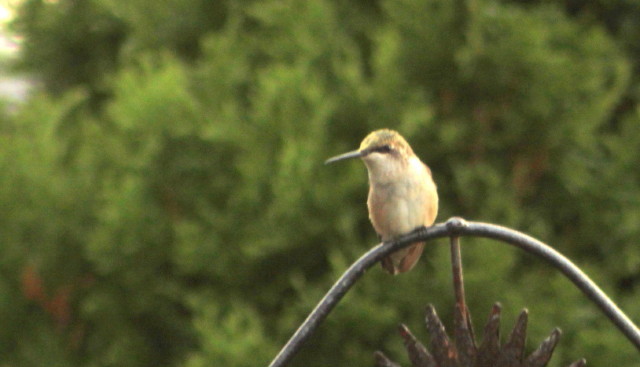
I have managed to take more pictures of visiting hummingbirds but still no ruby throat!
One day when Lady Luck will smile at me. I have a feeling that when I will see the throat I will not have my camera with me or I will have wrong lens…hmmm, maybe I shouldn’t even think about it or it will happen.
Let's have red Calibrachoa...

then white one...

and another red one.

On one shot I got lucky to capture resting hummingbird with his long tongue out and some yellow nectar at tip of his beak. I didn’t see it till the shot was uploaded on my computer and zoomed in.

Critters in Our Garden

It was interesting to see how many welcome and un-welcome critters visit our garden in just 5 short minutes. With all the flowers in our garden it is inevitable that we will see lots of insects and birds. We are lucky that we don’t have any racoons even though they do a lot of damage just 20 meters across the street by digging up the lawns looking for white grubs. Same goes for deer and badgers, they just do not cross the street. Rabbits and chipmunks are another story. I have learned which flowers and plants need protection and which they don’t like. It is unfortunate but I had to put up chicken wire fences around my peas, beans and other plants. Chipmunks might look so harmless and cute but they did chew up my irrigation tubing and dug up some plants. I have to admit, though, they are fun to watch just like the rest of garden creatures.
These pictures were taken in just 5 minutes from our deck.

Garden enemy #1

Cute, but can be destructive.

Mourning Dove taking a break.

This insect looked like a fly but behaved like a bee.

And, speaking of bees...

hard at work and not bothering anybody.

Monday, August 22, 2011

Tomato Sauce


I have to admit that until two weeks ago I have never made or tasted pure tomato sauce. I have made hundreds of tomato sauces but they always had at least celery, peppers, onions and garlic in them. This was my very first time that I have made tomato sauce from my very own tomatoes with absolutely nothing else: no salt, sugar, onions, peppers, garlic or any other vegetables. Just tomatoes, slowly simmered for 4 hours (in this case) and then run through the food mill with the finest plate (1/16” holes). What a revelation it was! Mind you, I did make tons of sauces before using store bought tomatoes plus other veggies but since I have never grown paste tomatoes like Roma I had no opportunity to make basic sauce of my own. Now, I am hooked. Right after I have tasted the sauce I started Googling for San Marzano Lungo tomato seeds that have the reputation as the best paste tomato. Yup, I bought some and now my plans for veggie garden is going through some changes, at least in my mind, that is. My plan for next year was for only 3 tomato plants: one of each “Sweet Baby Girl” (cherry), “Magic Mountain (size and shape of large strawberry) and “Margherita” (Roma). Since San Marzano is meatier and dryer than Margherita I have decided to go with 4 Marzano instead and the salad tomatoes stay the same, 1 of each.
There is not recipe here as far as I can see.
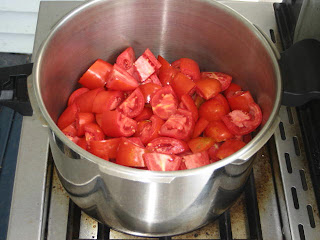
Cut tomatoes in half and then half again, put in pot, cover, and start the simmer. Stir tomatoes every so often to help them release juice but keep cooking it covered. After 3 hours I removed the cover (I never used pressure cooker locked cover) and let reduce to fairly thick consistency, stirring more frequently. Never let it burn!
When there is very little liquid visible at surface it is time to run it through food mill. I don’t know about any other substitute for food mill besides China Cap strainer (Chinoise). (Now we are talking hard labor here! I used Chinoise when I went to George Brown College’s culinary arts courses back in 1970’s and we had to make all sauces by hand, no food mills and no food processors, just large Chinoise. It is not fun!)


Food mill removes the seeds and tomato skin.

I started with 4 quarts (4L) of tomatoes that gave me 4 cups (1L) of thick sauce.

Since it was 30 °C outside I have decided to make the sauce on my BBQ side burner so I won’t heat up the house. Unfortunately, the BBQ burner doesn’t have too much of a heat control plus if I run it low the wind can blow off the flame. Compromises. Also, towards the end of making the sauce, when the sauce thickens, it is very easy to burn. Because it is much more likely to burn in thin bottom pot I have decided to use my pressure cooker pot because it has very thick bottom. It all worked like a charm.

When done, you have a great basic tomato sauce to be used for many other sauces.
My first sauce was simple spaghettini sauce where I sautéed onions, eggplants, celery, red pepper, garlic (lot of it), hot pepper flakes and oregano for 15 minutes, added the tomato sauce and simmered for 30 minutes on low. Done, no straining or mashing, I like some texture in this sauce.
It looks like I might buy some Roma tomatoes at our farmer’s market to make some more sauce, it is that good!

Sunday, August 21, 2011

Hummingbirds


Looks like hummingbirds are on the way South and I am having fun with my Canon Rebel T1i camera and my long lenses. Although I am fairly new to digital SLR camera I am an old hand with a regular SLR, something like 35 years, thousands of slides and so much time spent in my darkroom it is wonder that I didn’t develop night vision just like owls have. What an incredible invention digital camera is! Buy good, fast memory SD card, get a spare battery and you can shoot all you want without any additional cost. I just love it.

Anyway, the hummingbirds are feeding on our flowers, especially Cardinal Flower and Calibrachoa (Million Bells) so often now that all I have to do is sit down and wait. I like to use manual focus because I am used to it and because the autofocus with long lens is very unreliable. This afternoon as I was adjusting some settings on my camera flash that is always mounted on the side of my Canon, I spotted one hummingbird coming to the Cardinal Flower. I went to work and this is the result of just about 30 seconds of shooting.

All pictures were taken with 75 - 300mm f/4-5.6 lens, manual focus, single frame shooting, flash set on E-TTL exposure metering, shutter speed 1/200 (synch speed for flash), aperture automatic, ISO automatic. The planter with the flowers was about 18 feet away from where I was standing. See the arrow.

Since tripod with hummingbirds is not practical, very steady hands are prerequisite. Right hand holds camera and triggers the shutter and left hand focuses the lens.
Now I have to figure out the light angle so that hummingbirds will show off his ruby throat! I will move around and see what the best angle is. Isn’t it nice to have some free time on hand? J


 These two shots are just half a second apart


Friday, August 19, 2011

Zinnias

Collecting seeds for next year.

When I started growing zinnias from seeds back in February I had no idea what to expect. To be totally honest, I had no idea what zinnia looked like. I was ordering veggie seeds from Johnny’s Seeds and before I send it over Internet I have asked Marjo if she is interested in growing some flowers from seeds. Yup, she was. Got a list about double of what my order was. Good, I will learn as I go, I said to myself. I had no clue how to grow flowers from seeds. Some need light, some don’t…you get the picture. Reading the detailed instruction, and Johnny’s Seeds has the most complete and detailed instructions anywhere, is an absolute must. What struck me the most is how tiny, basically microscopic, some seeds are. Lobelia is one that just floored me. It is not a seed as much as it is a dust. Next year I know what to do.
Back to Zinnias. What an incredibly spectacular plant this turned out to be! It started blooming in April in our sunroom and it looks like it will bloom till first frost, about 10 weeks from now in our zone 6a. And the flowers! Just like small dahlias. Well, the flowers are open pollinated, not F1 hybrid that you can’t collect seeds from, so I have decided to collect seeds for next year. Since Marjo ordered mix where you do not know what you are starting unless you scatter all the seeds over large area, I started collecting separate Zinnia colors and next year when I start them I will know what it is that I am growing. Once I have the seeds I will run a test just to see if they will germinate. I don`t want any surprises next February.
Besides being beautiful flowers they are also attracting Goldfinches. It didn`t take us long to see that if you do not deadhead all the dry flowers that birds will flock to it like kids to ice cream truck. The seeds are irresistible to them.

March 9, 2011


Five months later from just 9 cells.
Here are the individual flowers grown from mix.


It is amazing that such varied colors end up almost identical as a seed.

Monday, August 15, 2011

Our Peach Tree

IMG_0060

Our peach tree (“Reliance”) is now 4 years old and needed fairly severe pruning. Every expert I have talked to and every article I have read concerning peach tree maintenance have recommended this step. So, I did. Apparently I have done a good job by trimming about 1/3 of smaller branches and all the vertical suckers. In few weeks time the tree was absolutely covered in pink flowers.

Peach-May-13_1

Then, when leaves came out 2 weeks later they immediately started to curl, got brittle and the ones I didn’t remove fell off. The tree got leaf curl, fungus that is dormant in wood over winter and strikes in the spring.

IMG_0440_1

IMG_0443_1

There is a spray on the market and I have it but we had such a lousy fall that I just couldn’t do it. I needed dry period of 2 days and windless weather. There was not a single day that I could have sprayed. Anyway, new wood started to grow and with it new leaves but the fruits started to fall off just after forming and kept falling off till about end of July. We had 36 peaches left to mature.

IMG_0061

Last year the tree was so heavy with fruit that I had to support 4 branches with 2X2 lumber to prevent the limb from splitting. We had at least 200 pounds of fruit from that tree and were giving it away by buckets. Many branches were permanently bent because of the weight.

IMG_0058

29-07-2009

Fruit trees are fun to have but, boy, do they ever require TLC! This fall I will be spraying for sure. And next spring I will have to prune again because all the wood grew back, tree’s revenge, I guess.

Peach-8
One of 36 survivors.