Friday, December 30, 2011

My Photo Got Published – Again!


This is 5th time that my own photo got published in newspaper, this time it was my picture of Snowy Owl that I have posted December 13th. I am glad that Marjo talked me into sending it to the editor. Another newspaper clipping on my computer room wall.
Here is a link.

Thursday, December 29, 2011

First Snow of Winter 2011-2012

View through livingroom patio door.

Last Tuesday night, December 27th we finally got our first snow of winter 2011-2012. Even though it was only about 1-1/2 cm I still did shovel the driveway. Three days later all driveways are dry, even the ones that never got cleaned. Forecast is for plus 6 °C for next few days so I guess the snow will be gone by Sunday. I just love it! Actually, there is a golf course about 20 minutes away that is still opened. I am surprised because it is one of the best golf courses in area called Tarandowah, Scottish links type golf course with lots of deep bunkers. We just love this course with tight fairways and crapload of hazards. We drove by 2 weeks ago and the course was packed.

Wednesday, December 28, 2011

Another Week of Comfort Food


Christmas week is notorious for comfort food and my kitchen wasn’t any different.

Cannelloni. It just oozes comfort with béchamel, marinara and meat sauces topped with Asiago and Provolone cheeses and served with toasted garlicky baguette slices.

Roasted Chicken Thighs with Orzo. The thighs were roasted on a bed of carrots, onions, garlic and celery and served with orzo, one of our favorite pasta shapes. So good!!!

Pork Tenderloin pockets with local Swiss cheese. Tenderloin slices were pounded into a thin cutlet, seasoned with salt, pepper and Herbes de Provence and then stuffed with cheese and folded into an envelope shape. After shallow frying and then roasting in toaster oven I served them on bed of Lecsó (roasted peppers and onions).

Spaghettini with baby clams and cream sauce. Very quick to make and very good.

Our traditional Christmas meal: Pan roasted duck breast with red cabbage and bread dumplings. Duck breasts were cooked medium rare and just melted in my mouth. As usual, I used cold pan method where you start cooking the breast by placing breast skin side down in a dry heavy bottomed frying pan.

Tuesday, December 27, 2011

More Strobe Photography


As I was working my way through a book on Canon strobe (electronic camera flash) I always came back to photograph on the cover – raspberry dropped into a glass of water. It is a stunning composition but there isn’t any detailed description as to how the picture was taken, just a passing note that 2 strobes were used hooked to radio trigger. I took it as a challenge and after about 5 hours of experimenting I have managed to get somewhat similar image. No raspberries in refrigerator so I used frozen strawberry. I am sure that I could have taken better picture but I ate my prop. I’ll be perfecting the technique once I buy some fresh strawberries.


Oops…forgot to clean wineglass in between drops


My setup. One flash was placed behind and to the right of camera and second flash behind white screen. The flash on left is one from behind. Both flashes were triggered by radio trigger that was mounted on camera’s hot shoe.

I lowered steel nut that was tied to a string into the glass so that I could focus where the strawberry will be after drop.
Book that challenged me.

Sunday, December 25, 2011

Chicken Breast Roll with Mozzarella and Herbs


This chicken breast roll can be served hot with buttered noodles and tomato sauce or at room temperature thinly sliced and served with crusty bread. Either way it is a great meal for all seasons. I used mozzarella for stuffing but any melting cheese or even blue cheese or combination of both is great. Use of thermometer is almost a must since chicken breast dries very quickly, you don’t want to go over 160 °F. Remember that breast will keep cooking after being removed from oven. As far as seasonings goes, again, it is up to you. Touch of heat is always nice in any meat roll, I usually use chilies pepper flakes and freshly ground white pepper.

Ingredients
2 large boneless and skinless chicken breasts
1 cup grated cheese
1 tsp. Herbes de Provence
1/2 tsp. pepper flakes
Salt and pepper
Olive oil

Directions
Butterfly and pound the chicken breast into 1/4” thick cutlet. (Video that shows the process is attached.)
Preheat oven to 350 °F and place the rack in middle of oven.
Season the cutlet with herbs, salt and pepper and evenly spread the cheese on top stopping about 1” from edges and top. Start rolling away from you making sure that roll is tight. With one full turn left fold over the sides to enclose the roll and finish the roll. Secure the roll by tying loops with butcher twine at 2” intervals. Preheat non-stick frying pan with 2 Tbs. of olive oil on medium high and brown the rolls on all sides. Place the pan in oven and roast until thermometer reaches 155 °F, about 25 minutes. When done, remove from oven and rest for few minutes then cut slice s 1/2” thick. Serve with buttered noodles and tomato sauce.

Saturday, December 24, 2011

Duck Soup with Wild Rice and Barley

This is a simplified version of Duck Soup that I have posted previously and in my opinion it is a better and cleaner tasting version than soup using roasted carcass of a duck. I have also simplified the way I cook barley and wild rice. Since barley cooks in about 40 minutes and wild rice 10 minutes longer I started with wild rice and 10 minutes later in went the barley into same pot. You just can’t cook barley and/or wild rice in the stock meant as a final product, it would be way too muddy. Vegetables were added in sequence to a clear stock. But first, the meat was removed from the bones and stock was degreased. I do not think that I will be making duck soup from roasted bones anytime soon.
 
Ingredients for stock
Carcass from 1 duck including wings and neck
1 carrot cut in half
2 stalks of celery cut in half
1 onion quartered
1/4 tsp. each of whole cloves and allspice
1 tsp. crushed black pepper corns
2 cloves garlic

Place the bones in stock pot and pour in enough water to cover the bones by 2 inches. Bring water to simmer and start skimming accumulated scum from the surface until stock is clear, about 15 minutes. Add vegetables and then spices. I always use steel mesh tee egg for herbs and spices, it is so much easier to remove after, but you can use piece of muslin tied into a bag instead. Simmer for 2 hours but never let the water get to rolling boil or stock will be cloudy. Slow simmer that barely brakes the surface is ideal for making clear stock, any stock. When done, remove all the solids with slotted spoon and strain stock through fine mesh strainer or colander lined with few layers of muslin cloth into another pot. While still warm remove duck meat from bones and reserve. Remove the fat floating on surface with spoon and kitchen paper strips or let the stock cool overnight and remove the solid fat from surface. Your stock is ready to become a soup.

Prepare the soup
1/3 cup pearled barley
1/2 cup wild rice
1 carrot, peeled and diced
1/3 cup diced turnip
1/3 cup diced celeriac or parsnip 

While the stock is slowly simmering, prepare the barley and wild rice and get all the vegetables and meat ready. Start with washing barley and wild rice in a strainer under running water, separately, of course. Place the wild rice in a pot with about 3 inches of lightly salted water to cover. Bring to slow boil and about 10 minutes later add the washed barley, cover and simmer for another 40 minutes. When barley and wild rice are soft strain and rinse under hot running water. While the grains are cooking peel and dice your vegetables and cut the duck meat. Start reheating the clarified stock, add diced vegetables and simmer until carrots and turnips are al dente then add washed barley and wild rice. Check and adjust the seasoning with salt and pepper as needed. Serve in individual bowls and garnish with chopped parsley. Toasted and buttered baguette slices on a side make nice addition.

Friday, December 23, 2011

Cuttlefish Appetizer


Octopus, cuttlefish and squids (Cephalopods) are notorious for being tricky to cook. There are basically only two ways to cook them: very hot and short (under 1 minute) or long simmer, braze or bake, around 1 hour. Yup, that is a big gap to go from 1 minute if you miss to one hour! I have never tried the long cooking method before until now. Am I ever glad that I did try it! The cuttlefish came out so tender and buttery that I will use this long cooking method more often from now on. I have also read that pressure cooker gives excellent results and shortens the time three-fold so I will have to try this method as well.
For this recipe I used cleaned large cuttlefish tubes that I bought frozen in Asian supermarket. There were 2 tubes in a vacuum packed bag and were about 8” long and 3-1/2” wide with thick wall, absolutely ideal for my recipe.

Directions
Open up the cuttlefish and score the inside of the flesh in a crisscross pattern, being careful not to cut right through, then cut the cuttlefish into diamond shaped pieces. If you cut at angle the pieces will be very decorative, almost like a flower, once it is cooked.
To prepare a braising liquid: for each cup of cuttlefish pieces mix 2 cups of water, 1 cup of white vinegar and 1 Tbs. of Kosher salt. Place the squid in a pot large enough to hold the squid and braising liquid, cover the pot and turn on medium heat. When it comes to boil lower heat to simmer and continue cooking for about 45 minutes.
Strain the cuttlefish and wash under warm running water and then drain in colander.
While the cuttlefish is cooking prepare your pickling marinade by combining 1/4 cup of white balsamic vinegar, 1/2 cup of olive oil and hot pepper flakes to taste for each cup of cooked cuttlefish (they will shrink by about 1/3). Place the squid in a jar leaving about 1/4 of empty space and pour marinade over the cuttlefish. Fill with white wine to 1/8” from top, close and refrigerate overnight. Serve at room temperature with crusty bread as an appetizer.

Wednesday, December 21, 2011

Saumon en Papillote

Salmon in Parchment Bag


We love salmon, it can be served in so many ways! I wanted to write “cooked” but since salmon in sushi, sashimi or as a tartar is raw…you get the picture. I have served salmon in every possible way including simmered in fish chowder. One method, however, stands apart: en Papillote or in paper bag. Very classical and sort of high end presentation. I used to prepare it quite often but later I prefer to serve salmon raw or medium rare with super crispy (charred?) skin. I bought two salmon fillet portions without a skin so crispy skin method was out and I didn’t feel for sushi so one of the alternate ways was to bake the 
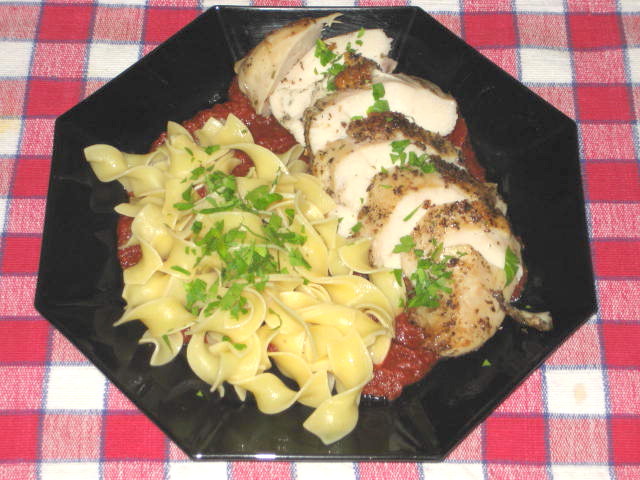
fish in paper bag. This method can also be used for other fish like cod, sea bass, trout etc. and even chicken breast. Seasonings used with salmon is quite varied as well: Asian with Enokitake mushrooms, green onions and sesame oil comes to mind, or my preferred way with julienned red and green pepper, zucchini, lemon, butter, sea salt and Herbes de Provence. Simple and yet very elegant meal.

Ingredients
2 Salmon fillet portions, skinless and boneless
2Tbs. softened butter
1/2 tsp. Herbes de Provence (recipe below)
1-1/2 tsp. coarse sea salt
1/2 tsp. freshly cracked or ground black pepper
3 thin slices lemon (1/8”) cut in half
2 pieces parchment paper cut into 15”X17” oval

Directions

Preheat oven to 400 °F.
Lightly butter center of parchment paper and place salmon just below the center. Sprinkle sae salt and black pepper on top and top with 3 lemon slices followed by julienned peppers and zucchini. Mix butter and herb mix together and dot the vegetables with small pieces of herbed butter, about 1 Tbs. for each fillet.
Fold the paper towards you and start folding one side if the fold. Continue folding until you reach other side of fold and the bag is completely sealed. Tuck the last fold under to keep it closed.
Place oven on baking sheet and bake in preheated oven for 10 minutes for medium rare. It will keep cooking after being removed from oven. Cut diagonal slits on top of bag with scissors being careful not to get scalded by steam. Serve with mashed potatoes or rice in a bag or you can remove the salmon and veggies from the bag and serve it on preheated plate.


Start folding...

Last fold is placed under the packet

Another serving option is removing contents of the papilotte on plate.

 
Herbes de Provence
2 tablespoons dried savory
2 tablespoons dried rosemary
2 tablespoons dried thyme
2 tablespoons dried oregano
2 tablespoons dried basil
2 tablespoons dried marjoram
2 tablespoons dried fennel seed

Directions

In a small mixing bowl, combine all the ingredients together. Store in an air-tight container.

Tuesday, December 20, 2011

Home Made Mozzarella Cheese


Mozzarella is on of the most common cheeses you see in kitchen. Anybody that has tasted fresh mozzarella will attest that there is absolutely no resemblance in taste and texture to supermarket mozzarella sold in brick form or sliced. Luckily, it is fairly easy to make at home. Give it a try, it might become a regular on “To-do” list. It is on mine. Also, there is one more benefit in making this cheese at home: the leftover whey can be turned into great fresh ricotta cheese.

 Instructions  
Place 4 liters of whole milk into a stainless steel pot.  Measure all of the following ingredients into four individual containers.  This will allow you to make the cheese without worrying about measurements.
2 tsp. citric acid dissolved in 3/4 cup of water
1/4 tsp. Lipase powder dissolved in 2 Tbs. of water
1/8 tsp. rennet dissolved in 1 cup of water
1/2 tsp. flaked salt (optional)
(use only distilled water)


Making the Cheese
Place the pot of milk on the stove over medium heat. It is important that you heat the milk slowly.  Slowly pour in the citric acid and mild lipase powder while you gently stir. Heat slowly until the milk reaches 88 °F.  Stir every few minutes to prevent scorching the milk on the bottom of the pot. You will begin to see the curd develop.
Once the milk reaches 88 °F stir in the rennet and water mixture. Continue stirring every few minutes until the milk reaches 105 °F.
 
Developing the Curd
Remove from the heat and let the milk set, covered, for 20 minutes at 105 °F. Curd will now be fully separated.
Cooking the Curd
Use a slotted spoon or strainer to transfer the curd to a microwave safe dish. If the curd is too soft to transfer, let the milk sit a few more minutes. Pour off as much of the whey as you can. Gently press the curds together with the spoon and force more whey out of them. Squeeze out and drain as much whey as possible.
Place the curd in the microwave on high for one minute. Remove and press the curds again to force out more whey. The cheese should begin to mass together and become sticky. 
After removing as much whey as possible put the bowl back for another 30 seconds.
Add the flaked salt a little at a time and knead the cheese with a spoon as you would bread dough. It will become smooth and shiny. Place the curd back into the microwave and heat on high for one more minute.  Remove from oven and drain any remaining whey.  This time your cheese will be too hot to handle, about 130 °F.

Stretching the Cheese
Knead the cheese again until it sticks to the spoon and pulls away from the bowl.
When the cheese begins to stretch like taffy, it is almost done.  You can have some fun now by pulling and stretching the cheese until it is completely cooled.  This is an important step.  Stretching will make the cheese firm and stringy.  If you prefer a softer texture don't stretch as much.
Place the cheese in an air tight container or wrap in plastic wrap and refrigerate.  Use this cheese within one week or store it in the freezer for up to one month. If your cheese is too soft to shred for pizza, place it in the freezer then shred and use it partly frozen.
Ready for rennet addition.

The curd has formed...

The curd is ready for microwave oven. Notice the green whey that I will turn into ricotta later.

First heating...

Second heating...

First kneading

Cheese is ready to be formed into bocconcini. 

Four liters of 3.25% milk gave me just over 1 pound of mozzarella.

Wednesday, December 14, 2011

Photo Excursion December 13th


I just love to get out early in the morning! From early spring to late fall it usually means getting out on golf course or out to the garden but in the off season if the weather is OK I like to get out and shoot some pictures and if the weather is lousy it is either computer or kitchen work. Here are some pictures I took yesterday morning before heading out to London. First three pictures were taken just one minute apart and last two were taken 10 minutes later.

 The Sun is poking through the trees just above number 7.


On the way to London we have spotted and photographed Snowy Owl (previous post) and on the way back driving through Amish settlements we saw two Amish man loading corn on horse drawn wagon and taking it to the barn for storage. The corn was harvested more than 2 months ago and the corn stalks were neatly stacked into a 6 foot high pyramids. All their storage bins were full with corn cobs so it looks like they are set for winter.


Tuesday, December 13, 2011

Snowy Owl in Our Neighborhood


When I say “neighborhood” I mean anything within 20 minutes’ drive and since location of where we spotted the owl falls into this category then this owl is in our neighborhood. Now that general geographic location of this fairly rare bird for South-Western Ontario is established let’s get down to details.
This morning about 9 o’clock we were driving to London taking a scenic country road route. Nice sunny day, just few clouds on horizon and not a fleck of snow anywhere. The country roads here are quite chopped up so it is constant left turn and few kilometers down the road you do a right turn and so it goes until you zigzag your way in diagonal North-Westerly direction to Highway 401 or all the way to London just 45km away. Shortly after I made one of these direction changes I spotted bright white bird in a plowed corn field and immediately said to Marjo: “We’ve just passed a snowy owl.” I stopped immediately about 70 meters past the spot he was sitting, got out of the car and slowly opened up the trunk where I had all my camera gear from this morning sunrise shoot (yes, another one) including my heavy Manfrotto 500 tripod. I mounted Canon75-300mm zoom paired with 1.4X extender on the camera which was the longest lens in my bag, I left my Vivitar 120-600mm zoom coupled with 2X extender at home (never again!) and started to move towards the owl. I didn’t want to take my tripod because it is big and it would look threatening to the bird. I definitely regret that decision since I use tripod all the time, I like sharp photos. I was astonished how calm that bird was, he did pay attention to me as you can see from his expression but he was too busy getting at his meal that looked like a groundhog or rabbit, it was dark grey brown and fairly large. He lifted it few times but I never caught it on camera. I will go back tomorrow with my long lens and see if I can relocate him again. The location where he was to day is at  42°53'13.69"N, 80°53'53.00"W, which is on north side of Wilson and west of Pigram Rd. in Elgin County, south-east of London.

Most of the time, I was ignored. Too bad I didn’t use my tripod!!!

Sunday, December 11, 2011

Interesting Morning Photo Shoot


Yesterday (December 10th) I have witnessed very rare occurrence when sunrise and full moon set coincided within minute of each other. It was quite coincidental discovery for me. I was driving west to shoot a sunrise over a local wood lot when I have spotted huge moon setting in north-west direction. The moon was full, huge and had a yellowish tint while the ground was almost red because of dramatic sun rise at the same time. I shot about 20 frames of each. For the moon I was lucky to have my 600mm with 2X extender with me, that gave me 1,200mm long tele lens. The Sunrise was even more dramatic, blood red and for about half a minute all the fields were red like Savannah in Africa. Now I have to find out when the sunrise and full moon set will coincide again but I guess that it is quite rare, maybe once in a lifetime occurrence when you factor in the weather.
Celestian information from Garmin MapSelect.

Canon Rebel T1i, 160mm lens, f/5, 1/3,200, ISO 400
Sunrise

Canon Rebel T1i, Vivitar 120-600mm zoom plus 2X extender, f/5.6, 1/60, ISO 400

...and most incredible Full Moon Set. Once in the lifetime chance to see both at the same time!
Note: These are raw and un-altered pictures.